Microsoft Outlook 2010 is not natively designed to be synchronized with CalDAV calendars or CardDav contacts, however with the help of a free plug-in that you can download and install, you can add these features. However, it requires some adaptations described here to work properly with your hosting with us.
The descriptions below are based on a Microsoft Windows 10 operating system. If you have another version, some operations may be slightly different, especially in terms of the location of buttons or texts displayed by the system interface.
Attention: what is described here is valid for all standard shared hosting accounts (MAIL, PERSO, EXPERT, ULTRA) but does not concern AlpMail type hosting.
You will find here how to proceed, in three steps:
- Download and install the CalDavSynchronizer plug-in;
- Configuration of the plug-in so that it can connect without errors to your accounts hosted with us;
- Configuration of the plug-in to add a shared account (CalDAV or CardDav);
Step 1: Download and install the plug-in
- Close Microsoft Outlook 2010 completely: quit the application;
- Download the "CalDavSynchronizer" plug-in at the following address: https: //caldavsynchronizer.org: "Download " section, then select the latest version ("Latest release" in English). Download the associated .zip file;
- Unzip the downloaded .zip file, if it is not done automatically by your system;
- Double-click on the freshly extracted "setup.exe
" file and follow the installation instructions.
If you start Microsoft Outlook 2010 after this installation, you will see a new tab in the interface, at the very end: "CalDav Sycnchronizer".
At this point do not try to create a synchronization profile yet: it will not work properly until you have completed all the steps described below.
Step 2: Plug-in configuration
This plug-in as it stands is incompatible with our servers: it will indeed display synchronization errors and you will not get the expected result. Fortunately, it is relatively easy to get around this problem: you just have to modify one of your own configuration files to activate an option making it compatible. Here is how to do it:
- Make sure that Microsoft Outlook 2010 is closed, exit the application completely if necessary;
- Click on the start menu of your computer and type or search for the word "note";
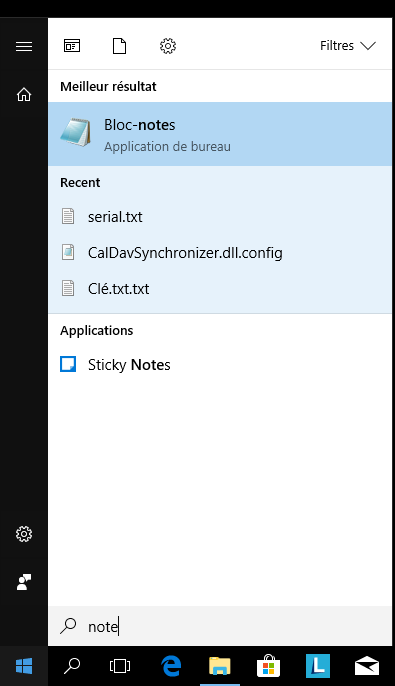
- When you see the "Notepad" application, right click on it and select "Run as administrator";
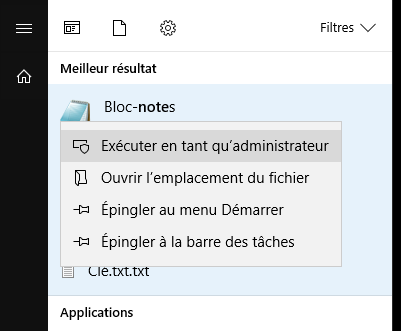
- Confirm the system alert by selecting "Yes " ("Do you want to allow this application to make changes...") ;
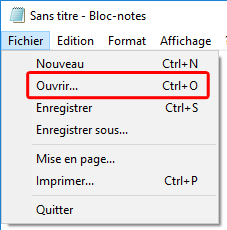
- Once the "Notepad" application has started, click on "File" and select "Open" (or press Ctrl + 0 on your keyboard);
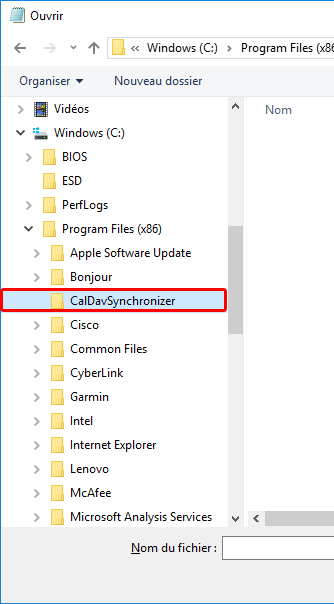
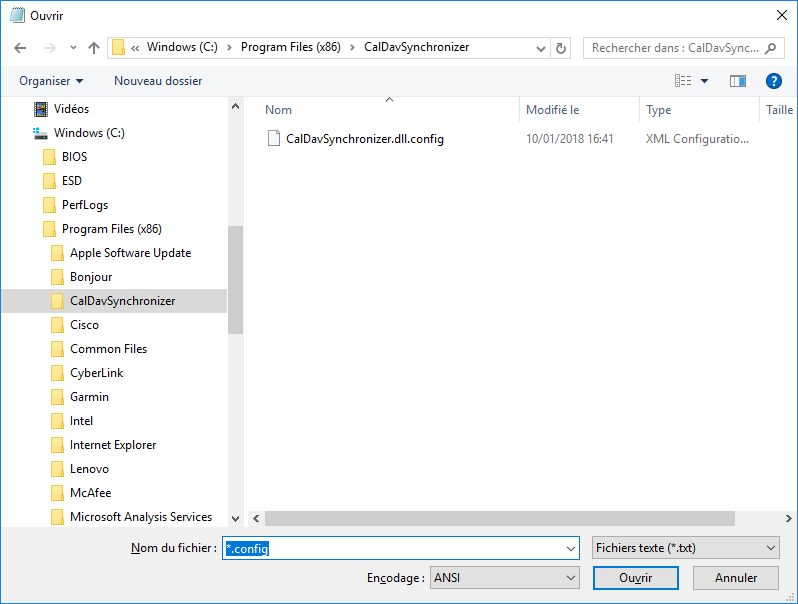
- In the file opening window that appears, navigate in your disk space to the location where you have installed CalDavSynchronizer. If you left the default path suggested during installation, you should find it in C:Program Files (x86) CalDavSynchronizer;
- In the "File name" field enter "*.config" and press "Open. You will then see the file "CalDavSynchronizer.dll.config" in the list of files;
- Select the file "CalDavSynchronizer.dll.config" by clicking on it once. Then select "UTF-8" in the field "Encoding" (bottom);
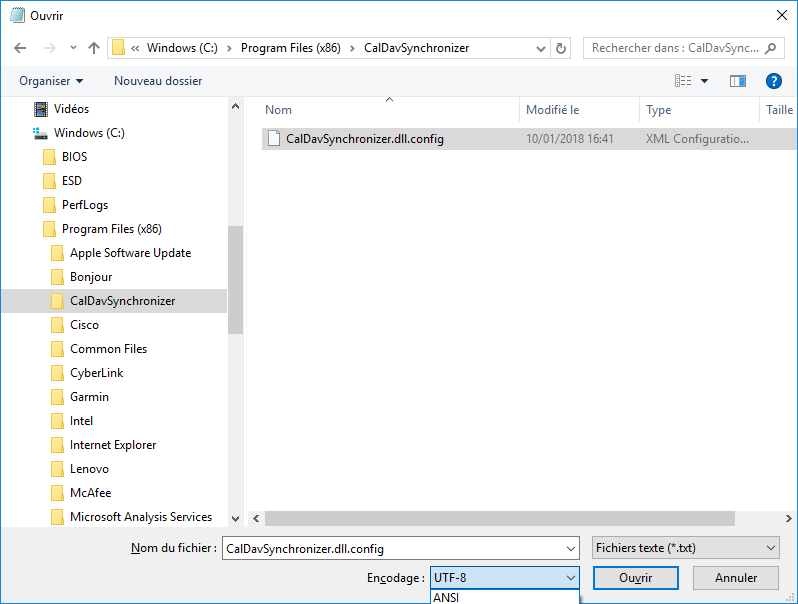
- Click on the "Open" button to open the file;
- Once the file is open, click on "Edit" and then select "Find" (or press Ctrl + F on your keyboard). A dialog box will appear prompting you to enter the text to be searched;
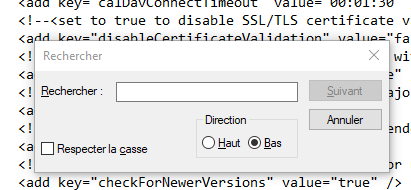
- Enter the following word in the "Search" field: "httpWebRequest" (without quotation marks) then press the "Next" button;
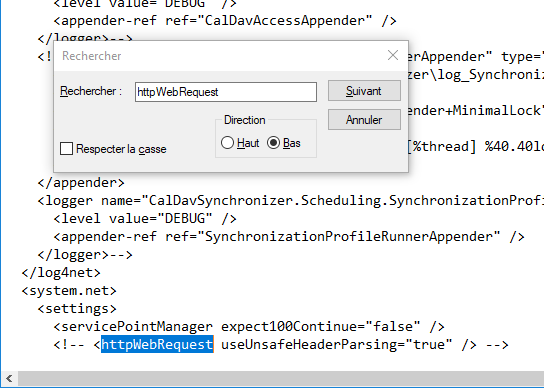
You should get a line containing the following text: - Close the search window and remove the comment tags, your line should now look like this:
useUnsafeHeaderParsing="true"/> 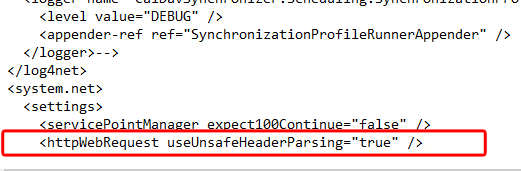
- Save your file by clicking on the "File" menu and then "Save" (or press Ctrl + S simultaneously) ;
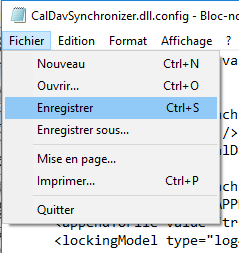
- You can now close/quit the Notepad application to move on to the next step.
Your Microsoft Outlook 2010 plug-in is now able to connect to our servers without any particular problem.
Step 3: Add a CalDAV/CardDav shared account in Microsoft Outlook 2010
To add a calendar or an address book (respectively CalDav or CardDav) in your Microsoft Outlook 2010 space, here is how to proceed:
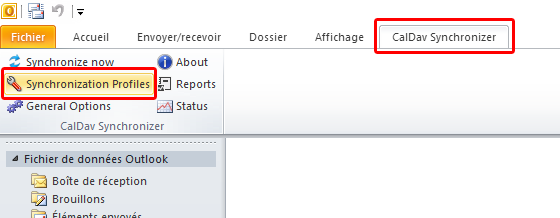
- Start your Microsoft Outlook 2010 application;
- Select the "CalDav Synchronize" plug-in tab and click on "Synchronize Profiles";
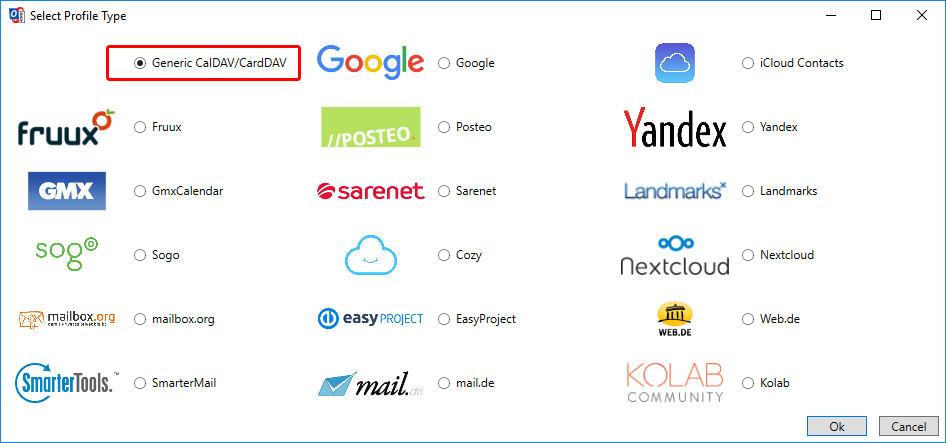
- Select "Generic CalDAV/CardDav" in the profile selector, then click "OK";
- In the profile configuration interface, enter a name in the "Name" field to name your synchronization profile.
Then click on the three small dots "..." to the right of the "Outlook folder" field;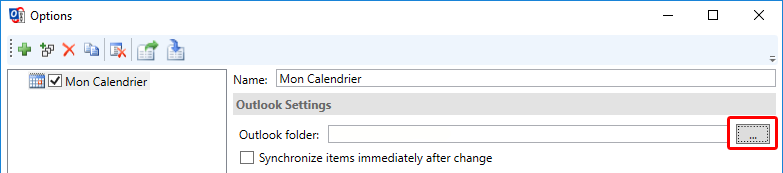
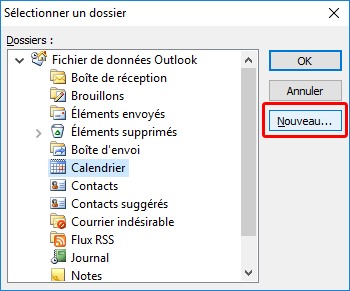
- In the selector of the folder to use click on "New";
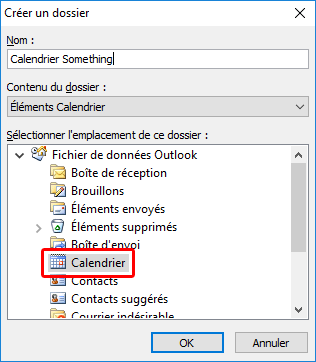
- In the "Name" field enter a name for your shared calendar or contacts then select the location of your new folder: in "Calendar" for a new shared calendar (CalDAV) or in "Contacts" for a new shared address book (CardDav);
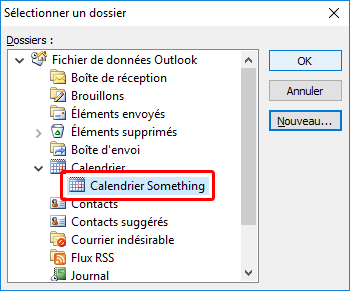
- Once back in the folder selector, select your new calendar or contacts folder you just created, then click on "OK" ;
- Back in the sync profile options, enter the "DAV Url" field with an address formatted like this:
https://mail. [domain]:2080/rpc/principals/[email address]
For example, to connect to the personal calendar of the email address diego@something.ch of the domain something.ch, you would enter:
https://mail.something.ch:2080/rpc/principals/diego@something.ch
In the "Username" and "Email address" fields, enter the email address of the account in question (in our example "diego@something.ch").
In the "Password" field, enter the password of the e-mail account used.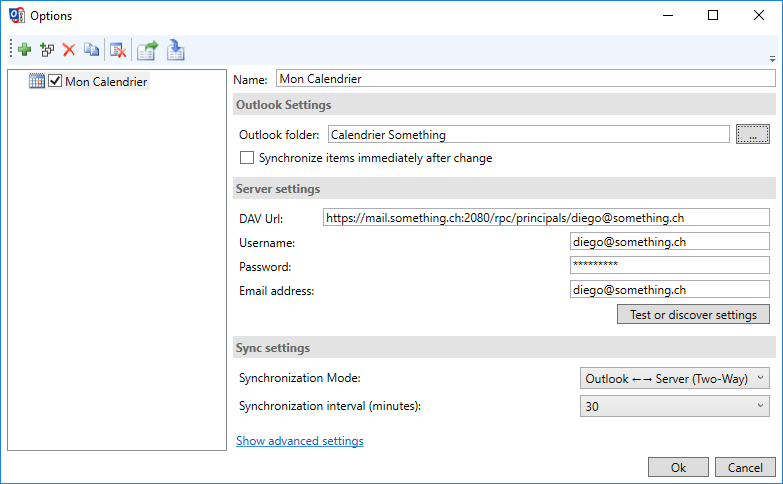
- Once all fields are filled in correctly, click on the "Test or discover settings" button. This may take several seconds.
When all is well, a window appears with the list of available calendars for this account: select the one you want to use and click on "OK";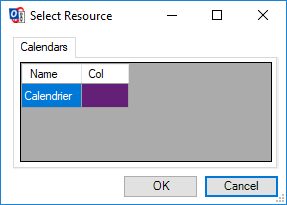
- Finally, a window appears to confirm that your connection settings are correct ("Connection test successful"), press the "OK" button to close it:
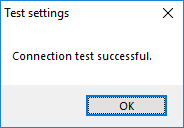
- Press the "OK" button of the configuration window of your synchronization profile to validate and save your configuration;
- You can now synchronize your calendar by clicking on "Synchronize now" in the "CalDav Synchronizer" tab of your Outlook interface;
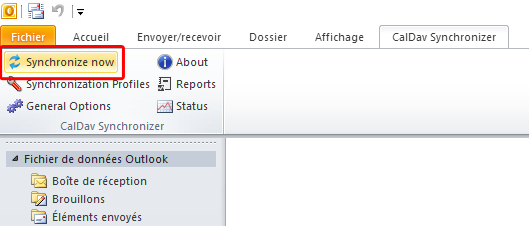
- You will find your synchronized calendars and/or contacts in the corresponding folder of your Outlook 2010 space:
To add several calendars and/or address books, you only need to repeatstep 3
above for each shared CalDAV/CardDav item to be added.