Here is how to configure your iPhone to access your email correctly and securely:
Note: the screenshots you'll find here were made with iOS version 12.1, they may differ slightly from your version if you don't have the same one.
Create your email access account
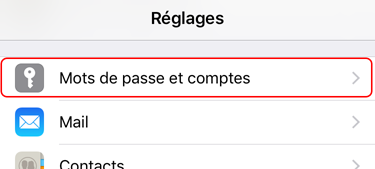
Start by going to the"Settings" of your iPhone:

Scroll down until you get to the"Passwords and Accounts" section, and select it :
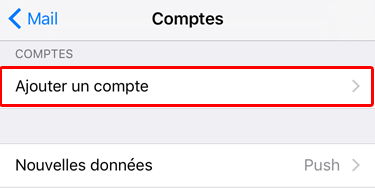
Select"Add Account:
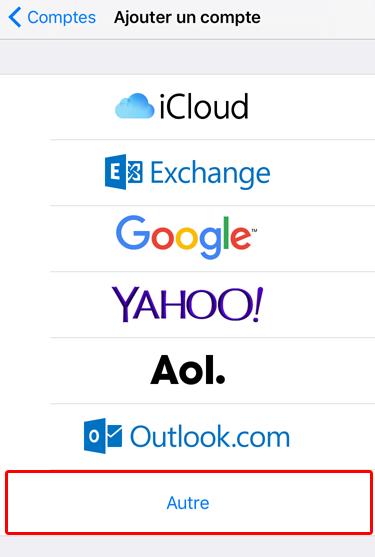
Then select"Other" at the bottom of the list of suggested accounts:
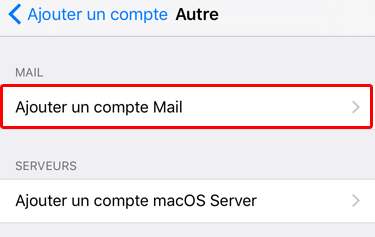
Select"Add a mail account" from the new list of choices:
Enter the information for the new account, based on your account information:
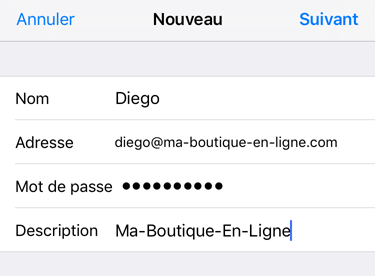
- Name: Your first and last name, company name, etc... This is the name that will appear in the messages you send to your recipients. For example "Diego - TiZoo Support";
- Address: The complete email address of the account you are setting up, for example diego@ma-boutique-en-ligne.com;
- Password: The password you set when you created your email address (for more information, please see: How do I create an email account on my domain? or How do I retrieve my email account password?) ;
- Description: Give your account a name that identifies it from any other accounts you connect to with your iPhone. This name remains only local to your iPhone, and is not published or sent to your recipients with your messages.
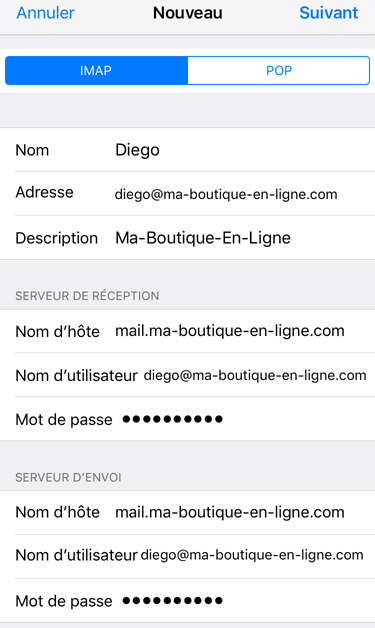
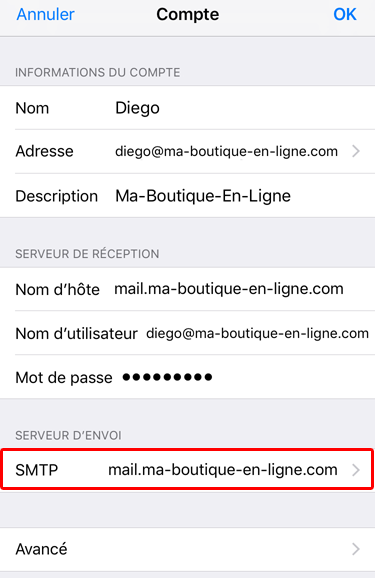
In the server configuration entry screen, enter the following parameters:
Account
- First of all, select the connection mode you want to use: IMAP or POP. If you don't know which one to use, see our suggestions in the topic: What to choose between IMAP and POP?
- Name: Check that what is displayed is consistent with what you initially entered;
- Address: Check that there is no error in the e-mail address displayed;
- Description: Check that what is displayed is consistent with what you originally entered.
Receiving server
- Host name: Enter your domain name preceded by "mail.", for example for the domain my-online-shop.com, you should enter mail.my-online-shop.com;
- Username: Enter your e-mail address (as in"Address" above);
- Password: Enter the password of your e-mail account.
Sendingserver: Same as"Receiving server".
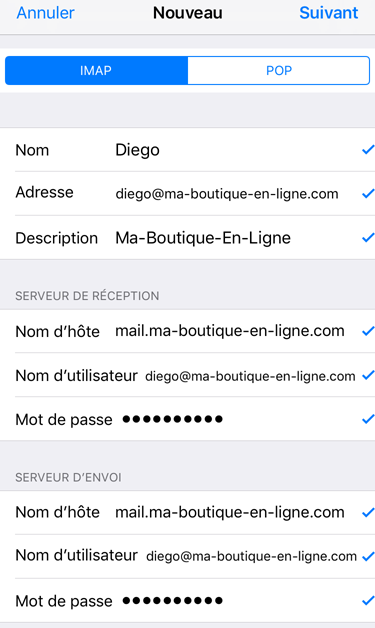
You can then press"Next" at the top right of your screen. Your iPhone will validate the existence of our servers (this may take a few seconds), but the configuration still needs to be changed manually to ensure secure access:
Note: Whatever the chosen connection mode, if the application reports an authentication problem, a certificate validity problem or a connection problem, check that you have a valid SSL certificate generated for your domain: How to generate a valid SSL certificate for your e-mail connection?
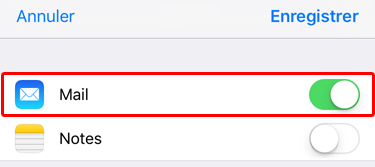
In the next page, activate at least the"Mail" access to be able to consult & manage your messages with this account (only for accounts with IMAP access):
Back to the list of configured accounts on your iPhone, normally your account is correctly configured automatically. If you encounter problems or error messages when sending or receiving emails, we advise you to read the following in order to verify that your settings are correct.
Checking the connection settings :
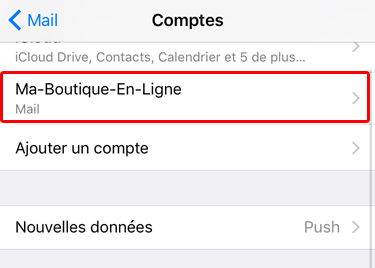
In the list of accounts configured on your iPhone, select the account you have just created (in our example it is"My Online Store"):
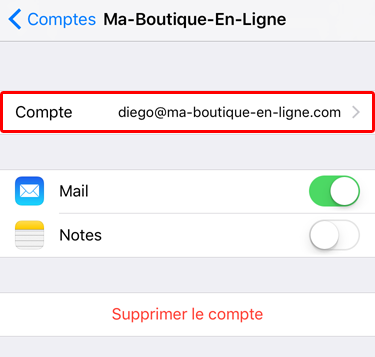
Select the line"Account" to be able to configure the advanced settings of your account (only for accounts with IMAP access, in POP mode, you go directly to the next step):
Finally, in the configuration page of your account, select, in the section"Sending server", the line"SMTP" :
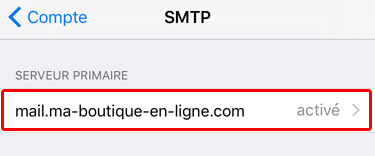
Then select your server:
In the settings, check that the information matches your secure connection settings, as explained below. Correct them if necessary, paying particular attention to the Server Port:
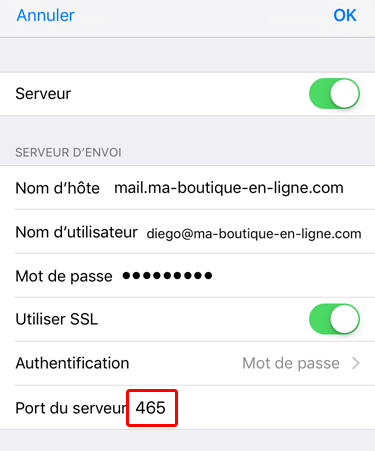
- Server: Enabled;
- Hostname: your mail server (your domain name preceded by "mail.") ;
- User name: your e-mail address currently being configured;
- Password: the password of your account;
- Use SSL: Enabled;
- Authentication:"Password" ;
- Server port: 465
You can validate by pressing"OK". It may take several tens of seconds for the new parameters to be taken into account.
Once back to the list of outgoing servers (SMTP), return to the configuration screen of your account by pressing the return button at the top left of your screen.
Then select the"Advanced" line this time:

Finally, in the advanced configuration that appears, scroll down to"Receive Settings" (the interface may be slightly different from the one below if you are setting up an account with POP access), check the following settings:
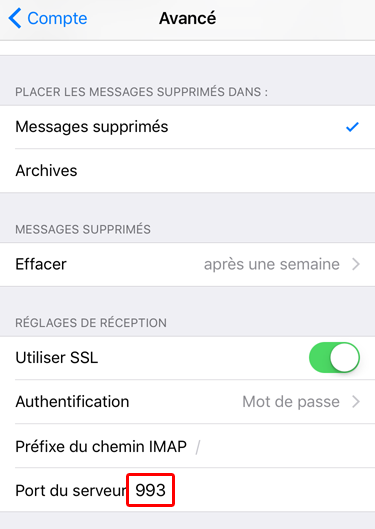
- Use SSL: Enabled;
- Authentication: Password;
- Server Port:
- If you are accessing in IMAP mode: 993 (as in the image above);
- If you access in POP mode: 995.
Reminder: Whatever the chosen connection method, if the application reports an authentication problem, a certificate validity problem or a connection problem, check that you have a valid SSL certificate generated for your domain: How to generate a valid SSL certificate for your e-mail connection?
Congratulations: your iPhone email account is now configured and ready to use!