A solution that can be very effective for your highly exposed e-mail boxes (with generic names like contact@, info@, sales@, etc... as well as any e-mail address published on your site or publicly on the Internet) is to activate "Box Trapper".
Box Trapper is an anti-spam manager that, in case of doubt about the origin of a message, asks for a confirmation from its sender before handing it over to you. This may seem a bit "heavy", but it is radical against most spam.
You can activate this service by following the steps described below:
Step 1: Login
- ;
Step 2: Access and activation
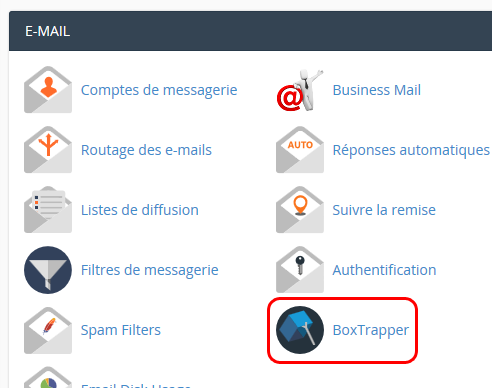
Once logged in, scroll down your control panel to the "E-MAIL" tab, then select "BoxTrapper":
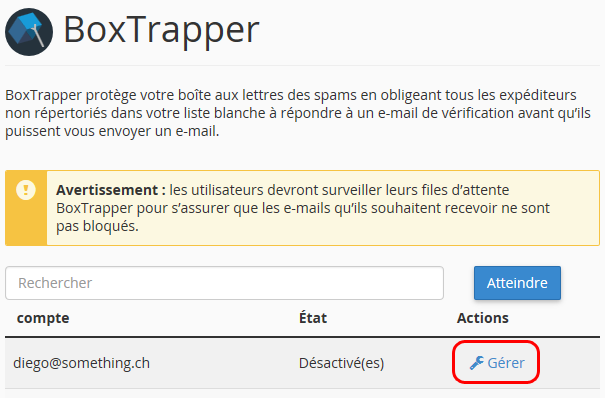
You will then see a list of email accounts hosted in your account. Click on the "Manage" button on the line corresponding to the email account for which you wish to activate BoxTrapper:
Once in the BoxTrapper management of the selected email account, click on the "Activate" button to activate the service:
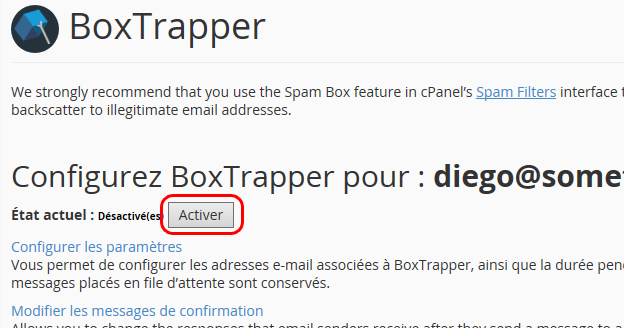
Your email box is now protected!
Step 3 (optional): Whitelist management
BoxTrapper allows you to list the email addresses considered as safe. It will never ask these addresses for confirmation when they send you emails. This allows you to include automatic mailing lists (newsletter, etc...) to which you would legitimately subscribe with the protected e-mail address; but it also allows your correspondents to avoid having to confirm each e-mail intended for you...
Automatically generate white lists:
The activation of this option is highly recommended, it considers that if you send an e-mail to someone it is because you expect a response and therefore that it is a recipient who does not spam you. This is what allows you to automatically consider your correspondents as reliable so that they don't have the heavy task of having to validate each e-mail they send you.
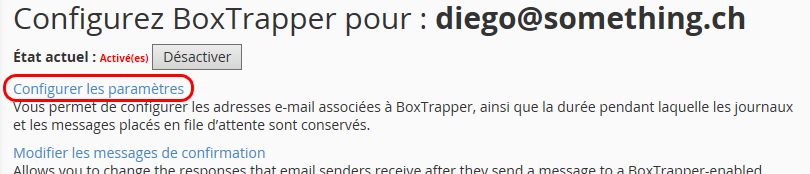
To activate it, once in the BoxTrapper management interface of a specific email account of your hosting (step 2 above), select "Configure settings":
Then check the two boxes that allow you to automatically generate white lists to the addresses you write to:
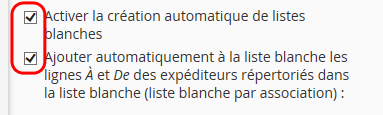
Don't forget to click on "Save
- " at the bottom of the page to validate your changes
Adding addresses to the white list manually
You can add or remove addresses from your white list manually. You can authorize the senders of mailing lists or newsletters to which you are subscribed, but also entire domain names regardless of the sender's email address.
To do this, once in the BoxTrapper management interface of a specific email account of your hosting (step 2 above), select "Modify whitelists/blacklist/ignore":
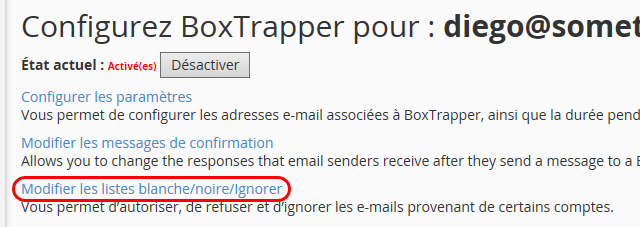
Then select "Modify whitelist" :

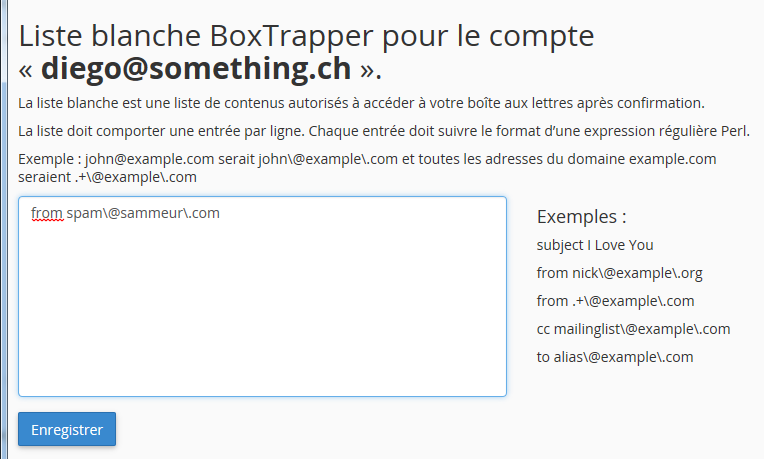
Once in the interface for defining your whitelist, you can add one entry per line of what you want to allow, this can be simple email addresses, one per line and putting "\" before the periods & special symbols, for example:
. to authorize diego@maboutique.ch you must enter "from diego\@maboutique\.ch" (without the quotation marks) ;
. to authorize a whole domain you must enter "from .+\@maboutique\.ch" (without the quotation marks) ;
Other possibilities are possible, examples are given to you by the interface and the knowledge of the regular expressions could be useful for an advanced use.
Do not forget to click on "Save" at the bottom of the page to validate your changes.
Note: You can manage your "Ignore" and "Black" lists in the same way later. The ignore list ensures that any e-mail from the listed addresses will not reach you, but the sender is not notified. The black list does the same thing as the ignore
- list except that the sender is notified of your choice (to ignore it) by an automatic reply e-mail.
Step 4 (optional): Customize the messages
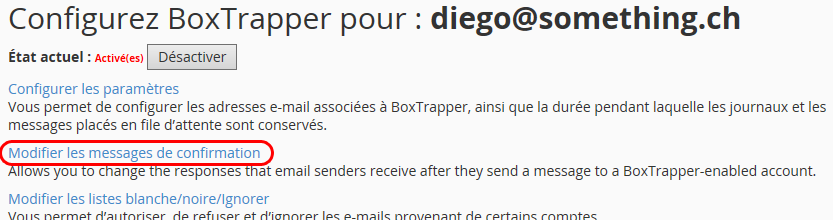
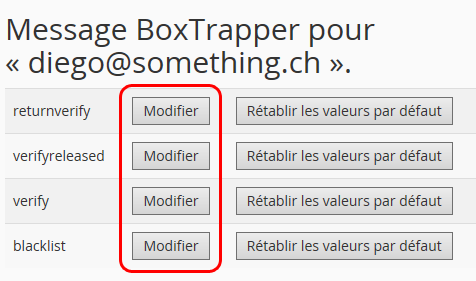
By default, messages sent by BoxTrapper are in English. If your correspondence tends to be in French (or another language), we recommend that you translate these messages so that your interlocutors understand more easily that they must be validated before you can receive them. To do this, you can modify and/or personalize the messages exchanged by BoxTrapper by clicking on "Modify confirmation messages" in the BoxTrapper management interface of a specific e-mail account (step 2 above):
You can then click on "Modify" for each type of message in order to translate or personalize it to your liking. However, remember to keep the tags included in the messages in order to guarantee their correct functioning, otherwise you may not receive anything in the e-mail account concerned...
Here are some translations that we propose to you to allow you to quickly and easily configure a French version (you can "copy and paste" the proposed texts to reuse them as is):
returnverify (confirmation of receipt of the validation message) :
To: %email%
Subject: Re: %subject%
This message is a response to the boxtrapper verification message.
No action is required on your part.
If you are waiting to be added to the user whitelist,
please make sure that the verification message you
replied to contained the correct verification string in the subject.
Boxtrapper has identified the following verification key: "%msgid%".
The headers of the message sent from your address are below:
%headers%
verifyreleased (message validated) :
To: %email%
Subject: You have been added to the %fromname% whitelist and your message has been delivered. (it was: %subject%)
This message notifies you that your verification has been received, and that your email address has been successfully added to our whitelist.
All pending messages sent from your address have been delivered to %fromname%.
No further action is required on your part.
The headers of the message sent from your address are below:
%headers%
verify (validation request) :
To: %email%
Subject: Your email needs verification - verify#%msgid%
The message you sent requires verification to confirm that you are a live human being and not a source of spam.
%if can_verify_web%
To validate this verification, simply reply to this message without changing the subject, or click on the link below:
http://%webdomain%/cgi-sys/bxd.cgi?a=%acct%&id=%msgid%
%endif%
The headers of the message sent from your address are below:
%headers%
blacklist (blacklisted) :
To: %email%
Subject: Re: %subject%
User %acct% is not accepting emails from your address.
The headers of the message sent from your address are below:
%headers%